- Place Linux Mint DVD or USB bootable image in the appropriate drive and reboot the computer in order to start with Linux Mint 18 installation.
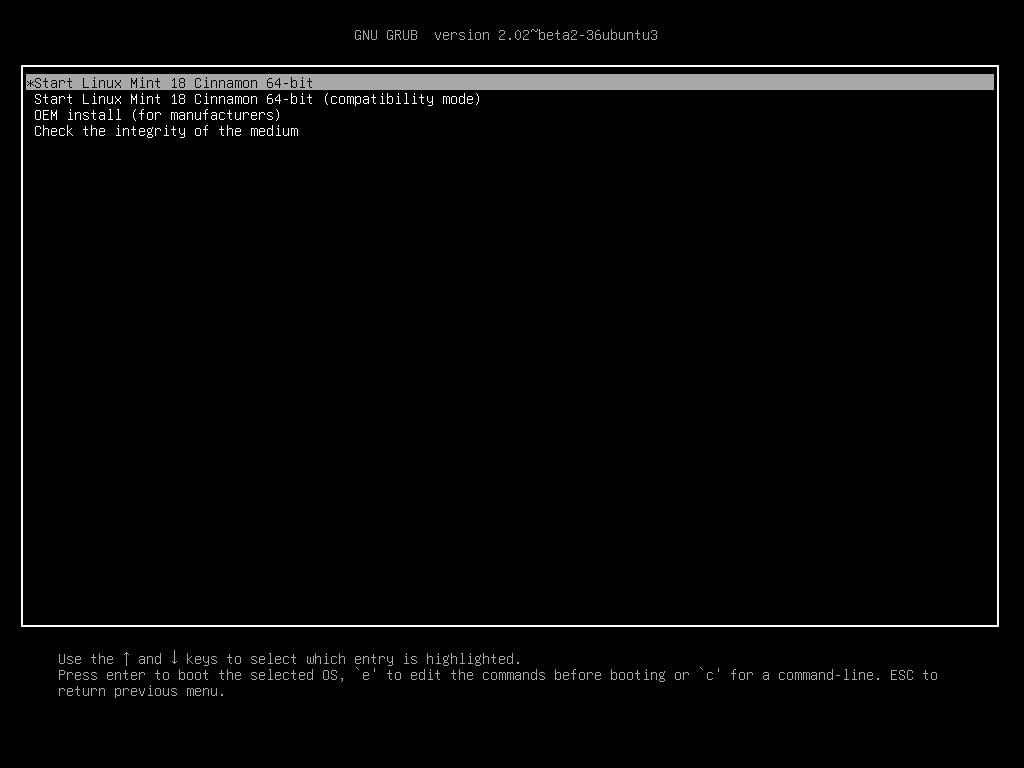
- After reboot, press the special function key and instruct the machine firmware (UEFI) to boot-up from the appropriate DVD or USB drive (the special function keys usually are F1, F8, F12, F10, F2 or sometimes del, depending on the motherboard manufacturer). Once the media boots-up a new screen should appear on your monitor. Choose Start Linux Mint 18 Cinnamon and hit Enter to continue.
- Wait until the system loads into RAM in order to run in live-mode and open the installer by double clicking on Install Linux Mint icon. Choose the language you wish to perform the installation and click on Continue button to proceed further.
- On the next screen hit on Continue button to proceed further. Third-party software can be automatically download and installed on this step by checking the check-box. The recommendation would be to leave the box unchecked for the moment and manually install proprietary software later, after the installation process completes.

- At the next screen you can choose the Installation Type. If Windows Boot manager is automatically detected you can choose to Install Linux Mint alongside Windows Boot Manager. This option ensures that the HDD will be automatically partitioned by the installer without any data loss.The second option, Erase disk and install Linux Mint, should be avoided for dual-boot because is potentially dangerous and will wipe-out your disk. For a more flexible partition layout you should go with Something else option and hit on Continue button to proceed further.
- Now let’s create the partition layout for Linux Mint 18. I would recommend that you create three partitions, one for / (root), one for /home accounts data and one partition for swap. Swap partition is necessary if you have RAM less than 8 GB, if you have RAM greater than 8GB, feel free to leave making the swap partition. Select the free space and hit on the + icon from below. On this partition use the following settings and hit OK to create the partition.
Size = 4096 MB Type for for the new partition = Beginning of this space Use as = swap area - Using the same steps as above create the /(root) partition with the below settings:
Size = minimum 20 GB Type for the new partition = Primary Location for the new partition = Beginning of this space Use as = EXT4 journaling file system Mount point = / - Finally, create the home slice with the below settings (use all the available free space to create home partition). Home partition is the place where all documents for user accounts will be stored by default, except the root account. In case of a system failure you can reinstall the operating system for scratch without touching or losing the settings and documents of all users.
Size = remaining free space
Type for the new partition = Primary
Location for the new partition = Beginning
Use as = EXT4 journaling file system
Mount point = /home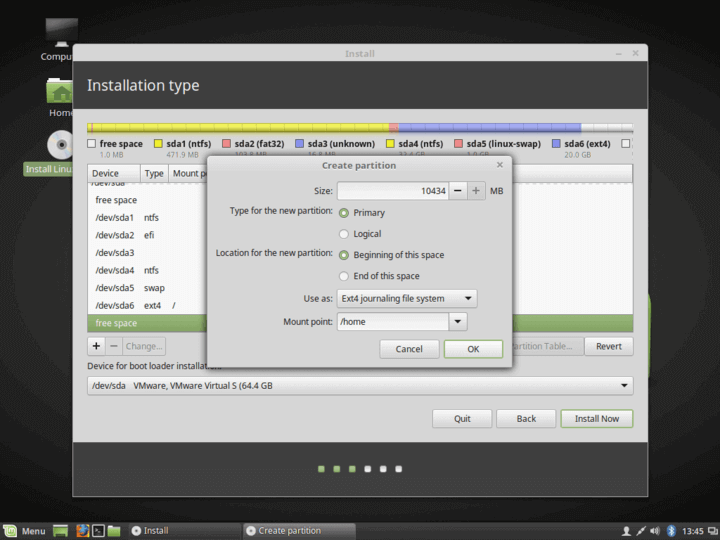
- After finishing creating the partition layout, select Windows Boot Manager as the device for installing the Grub boot loader and hit on Install Now button in order to commit changes to disk and proceed with the installation. Next a new pop-up window will ask you if you agree with committing changes to disk. Hit on Continue to accept changes and the installer will now start to write changes to disk. This has been taken from tecmint.com
Install Fest: Linux Mint

.png)